Provisioning of Contrail Cloud Clsuter via Contrail Command UI
URL for Contrail Command GUI Access https://192.168.2.10:9091
Username/Password: admin/contrail123
Note: Please make sure your Foxyproxy Firefox/Chrome plugin is setup before proceeding.
1. Add Servers
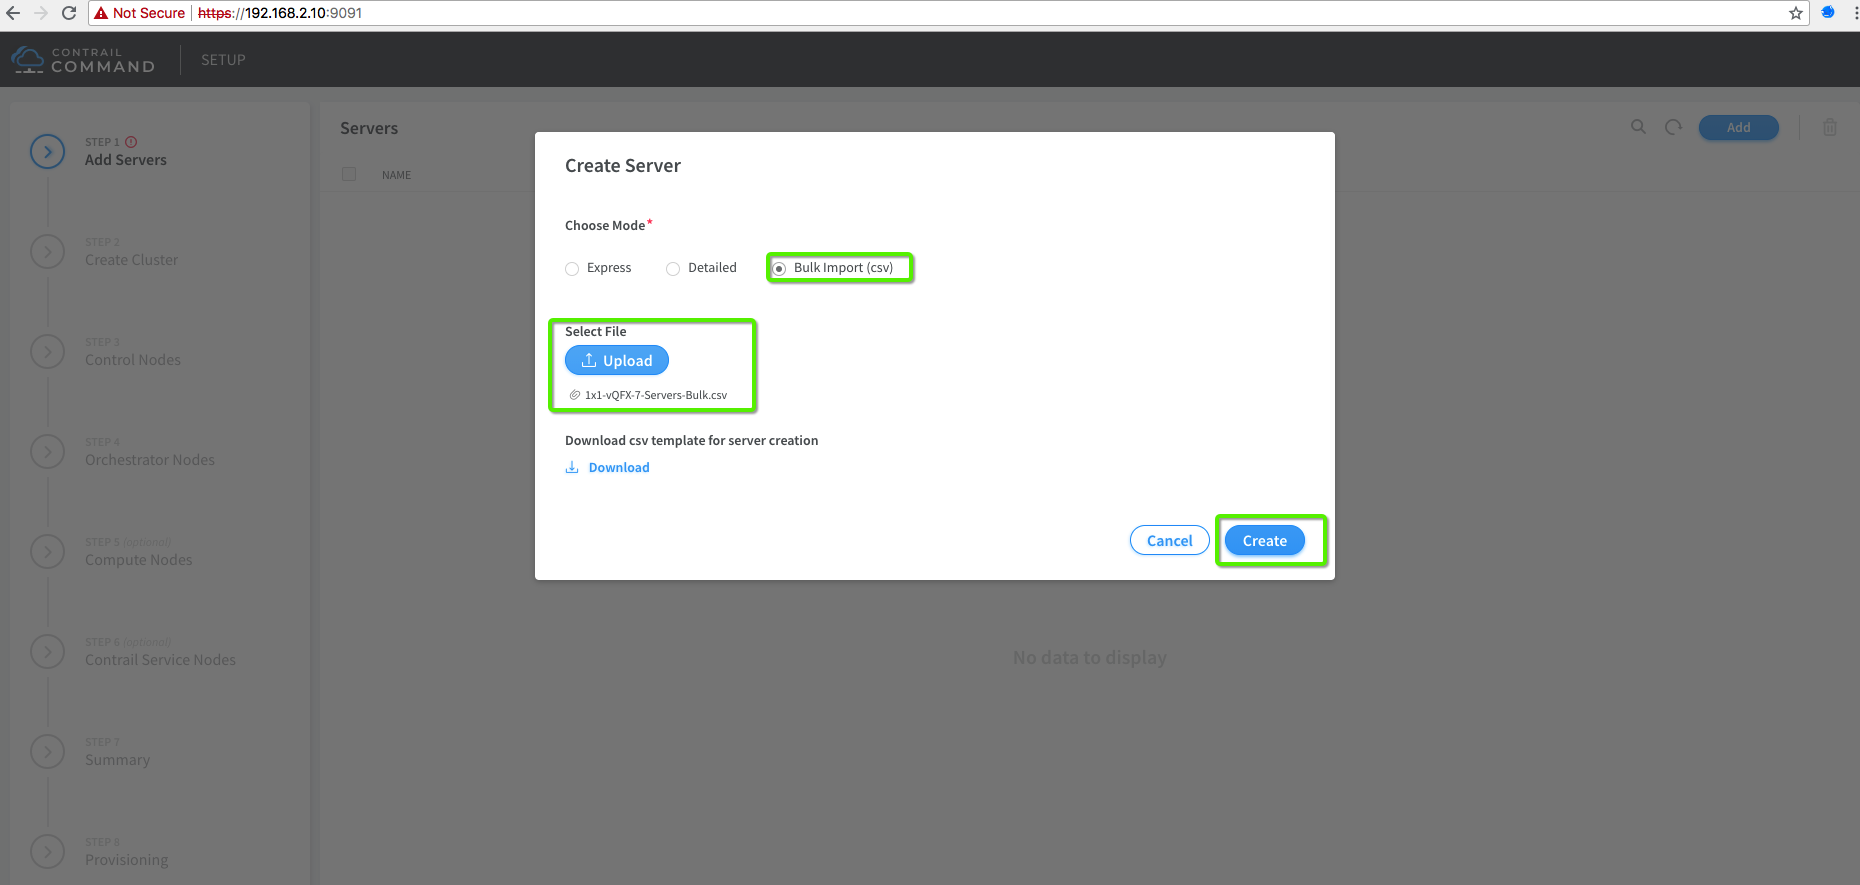
You can add servers one by one or in bulk. In case of bulk server add use following file and update the MAC addresses for l-srv4 & l-srv5 BMS nodes.
Bulk Server Add csv file
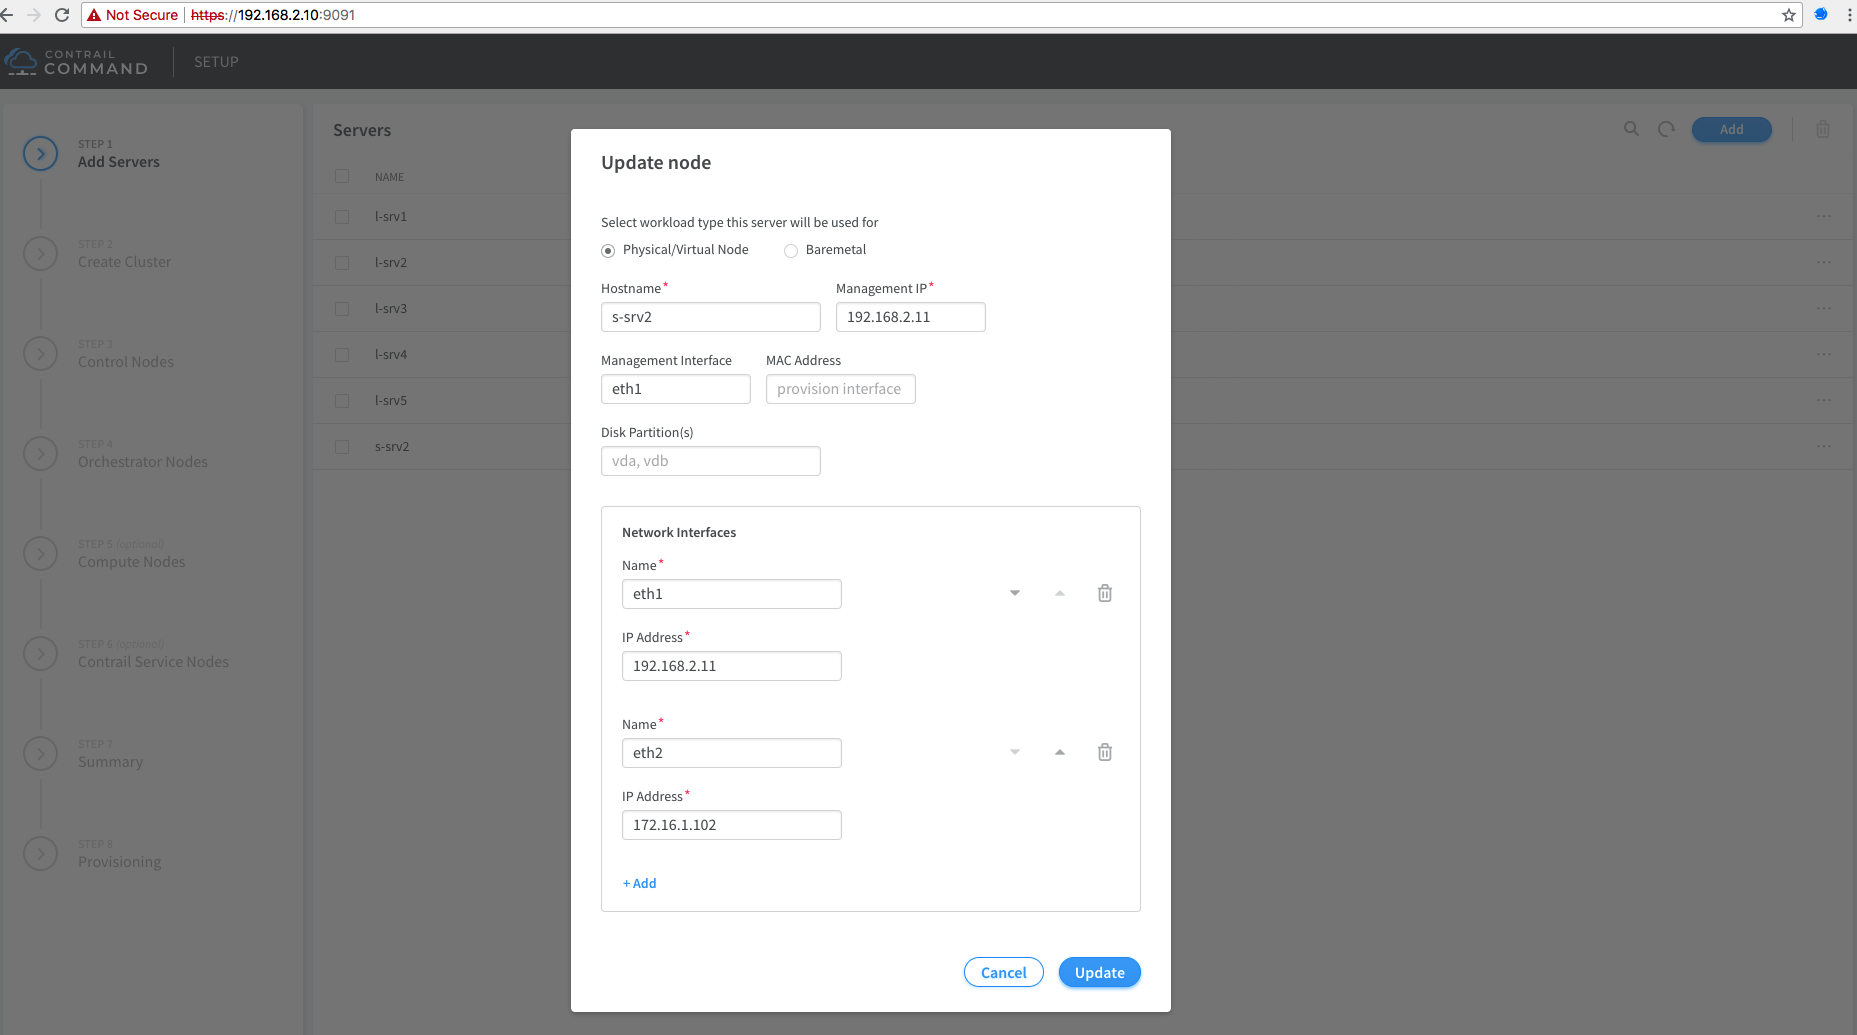
Single Server Add with two interfaces eth1 (MGMT) & eth2 (Ctrl+Data)
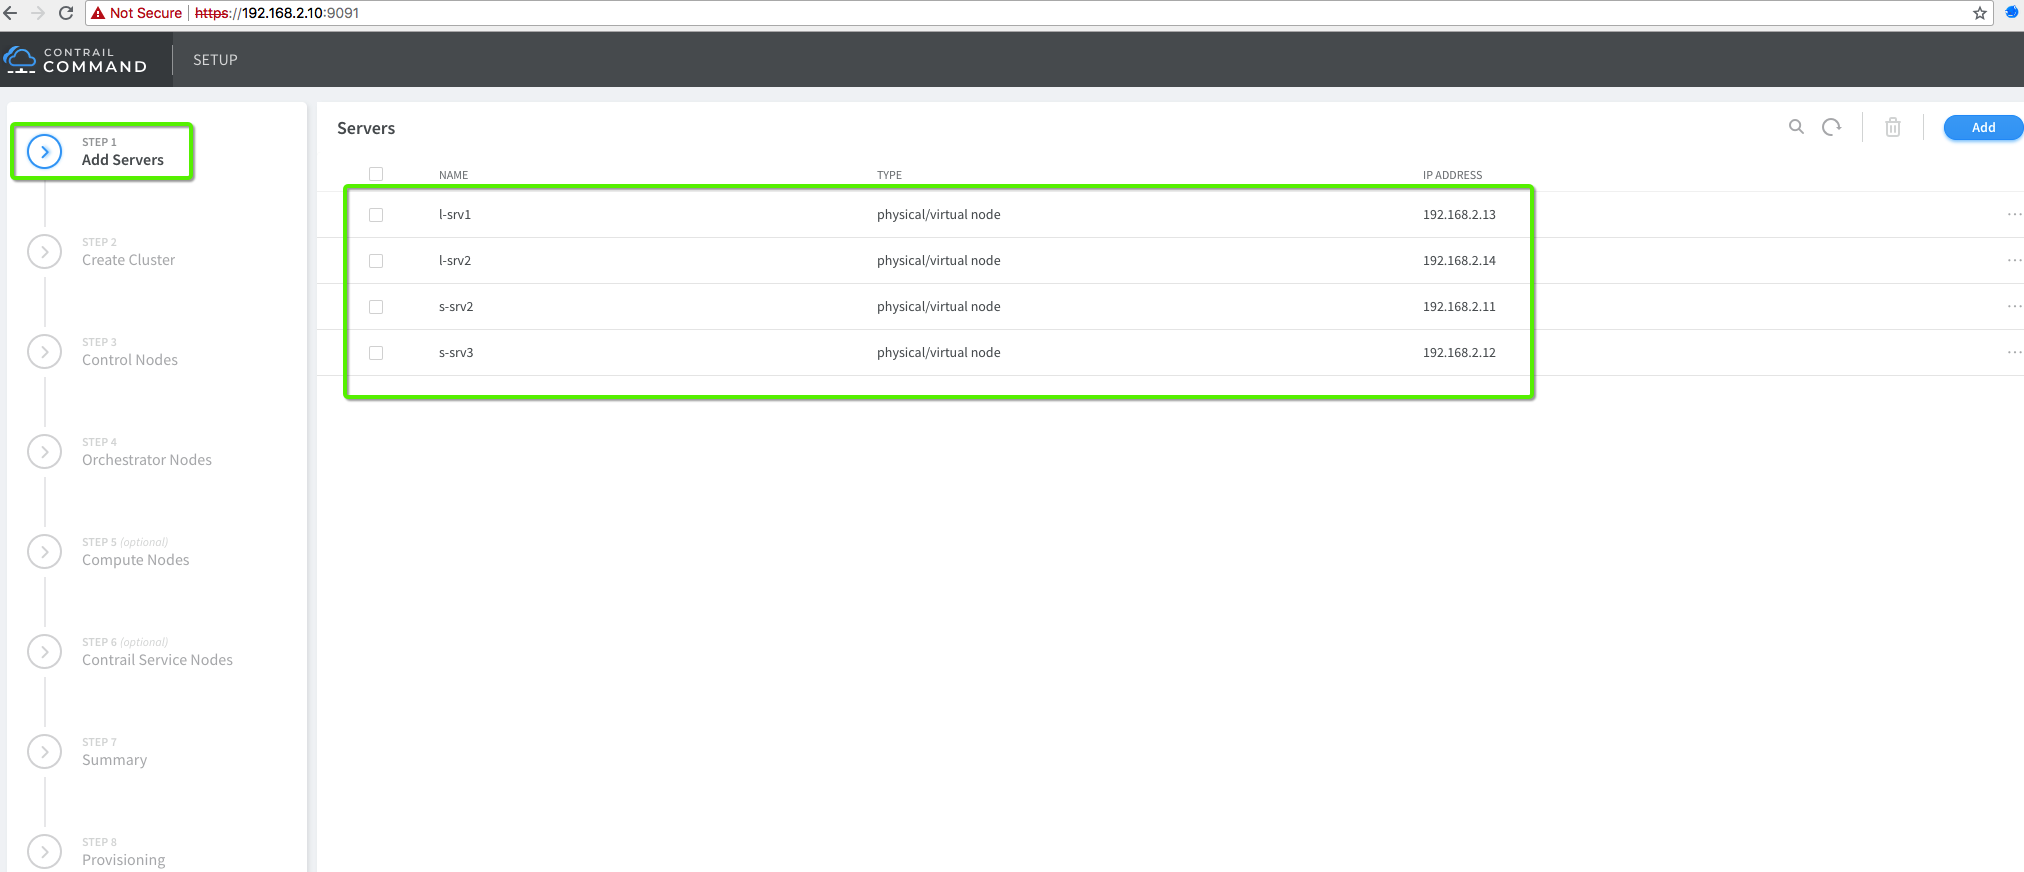
2. Add All Servers
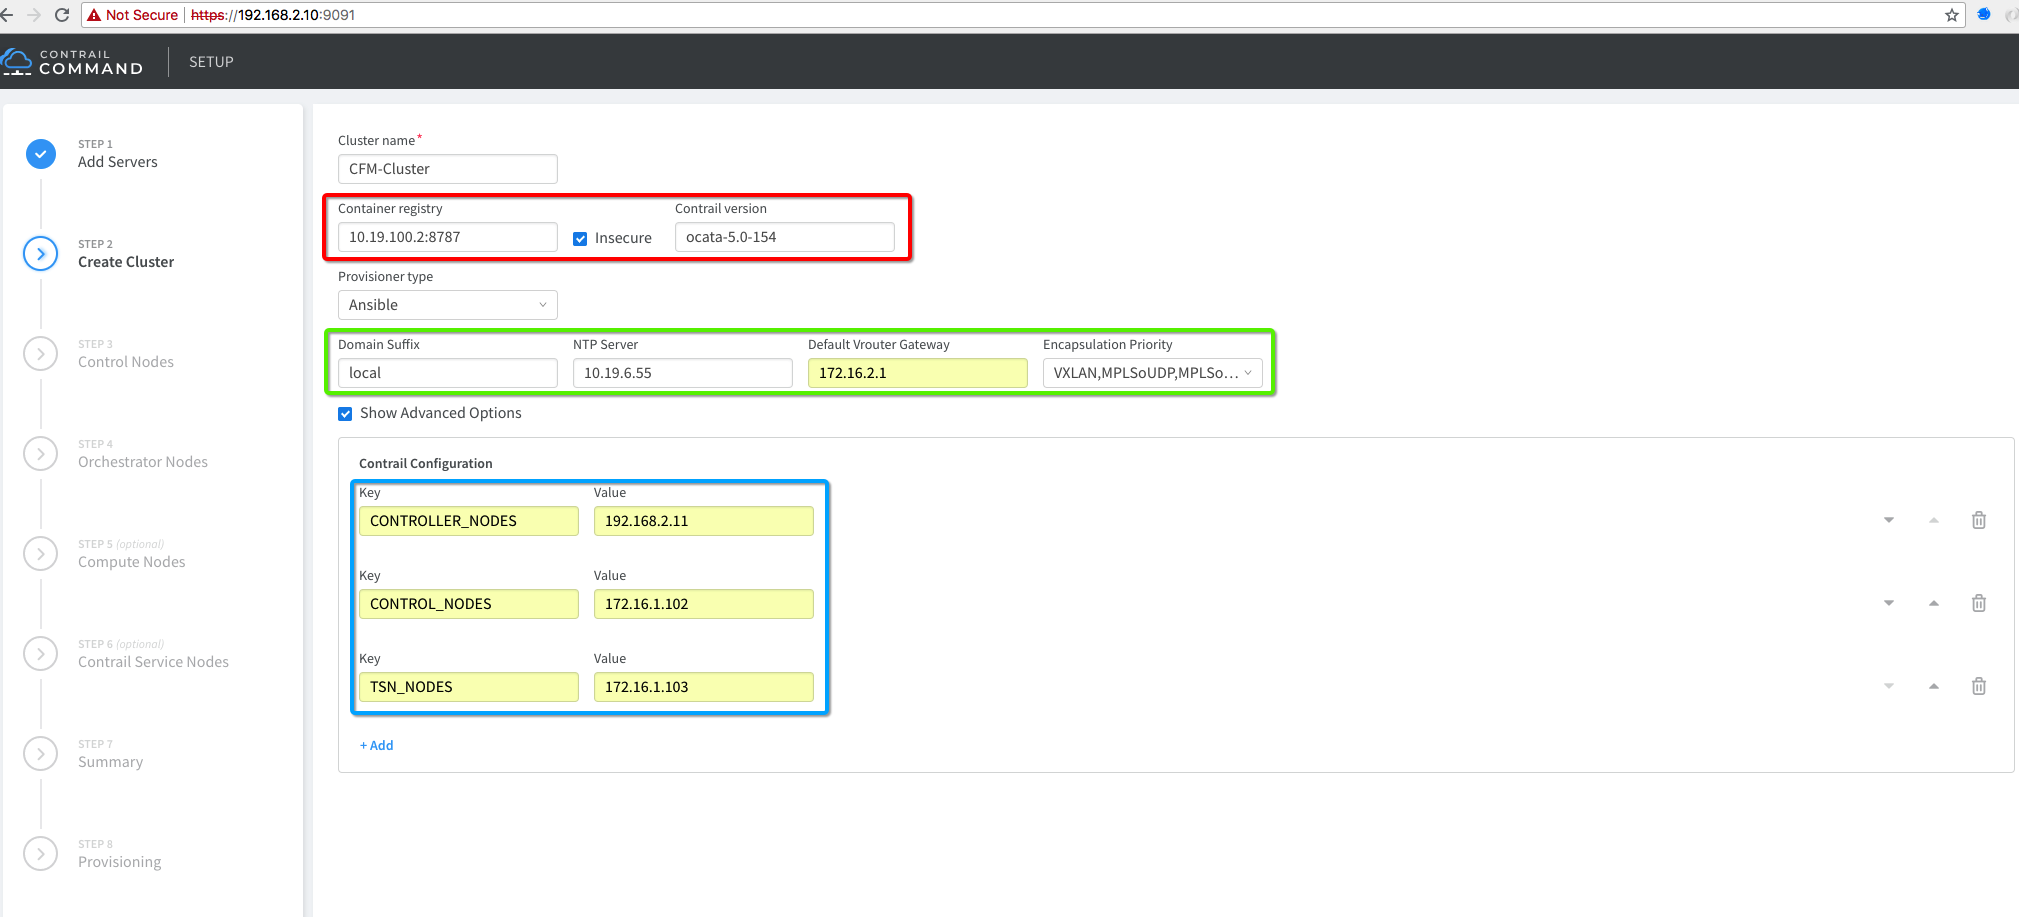
3. Create Cluster
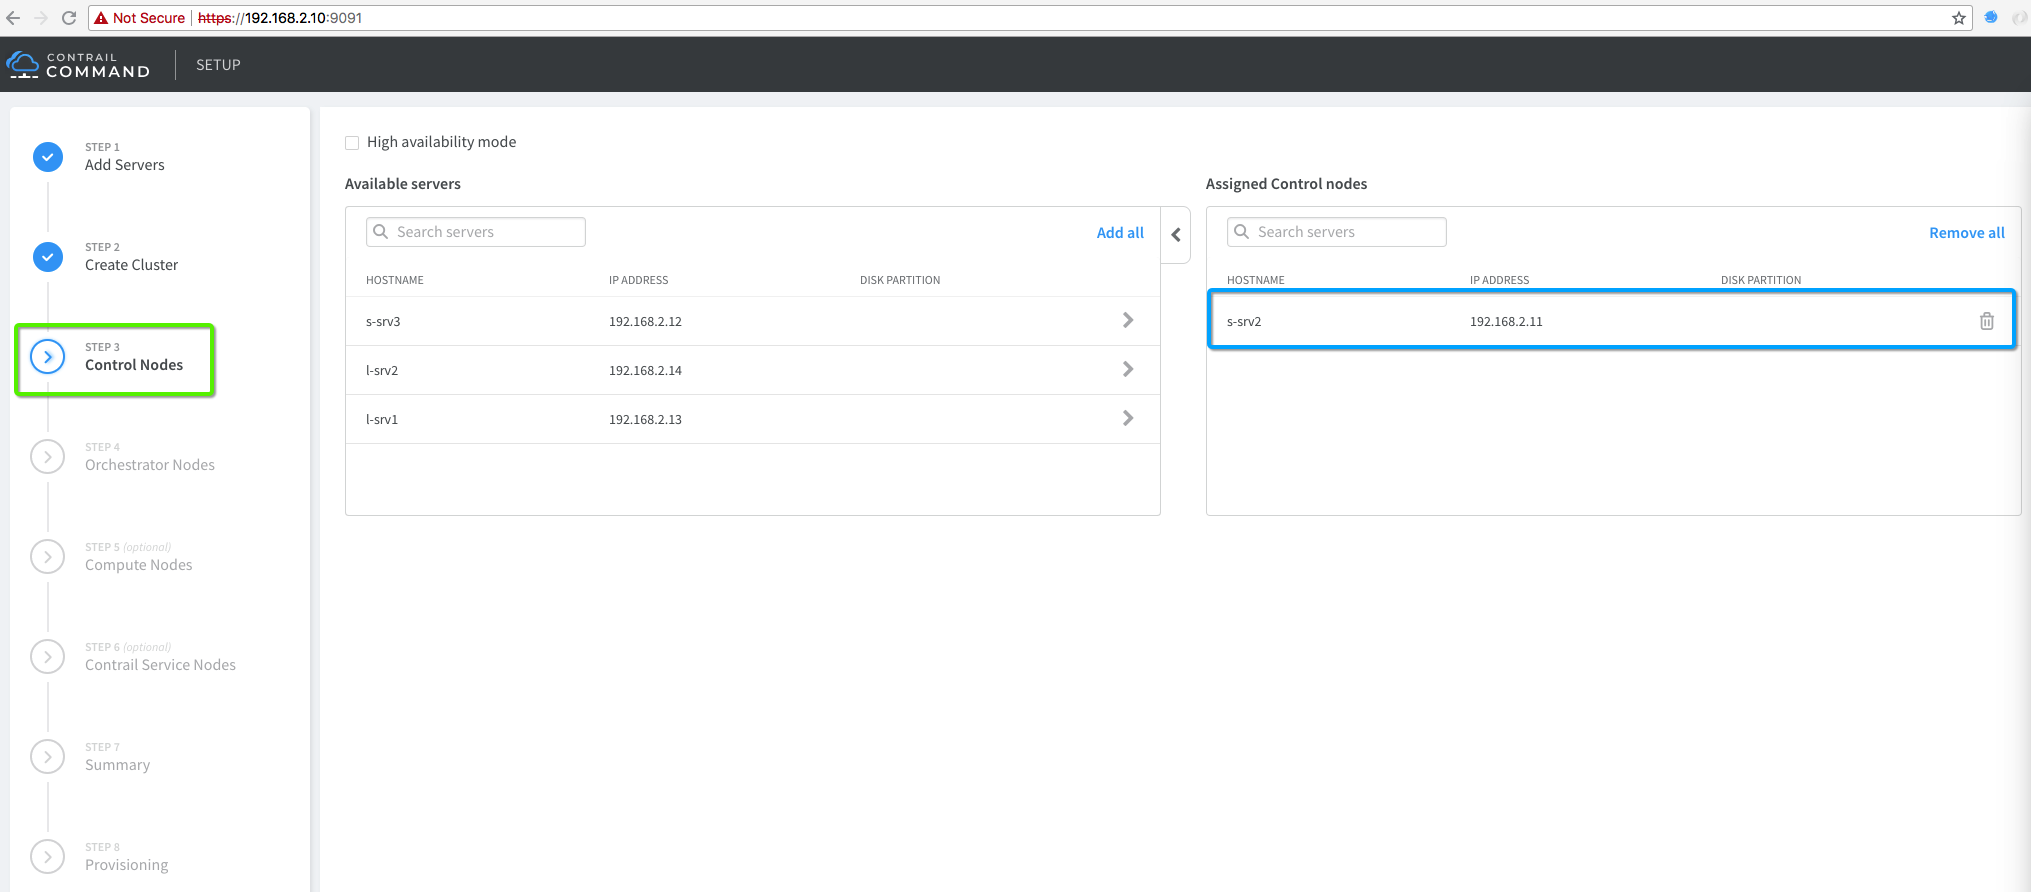
4. Add Contrail Control Node
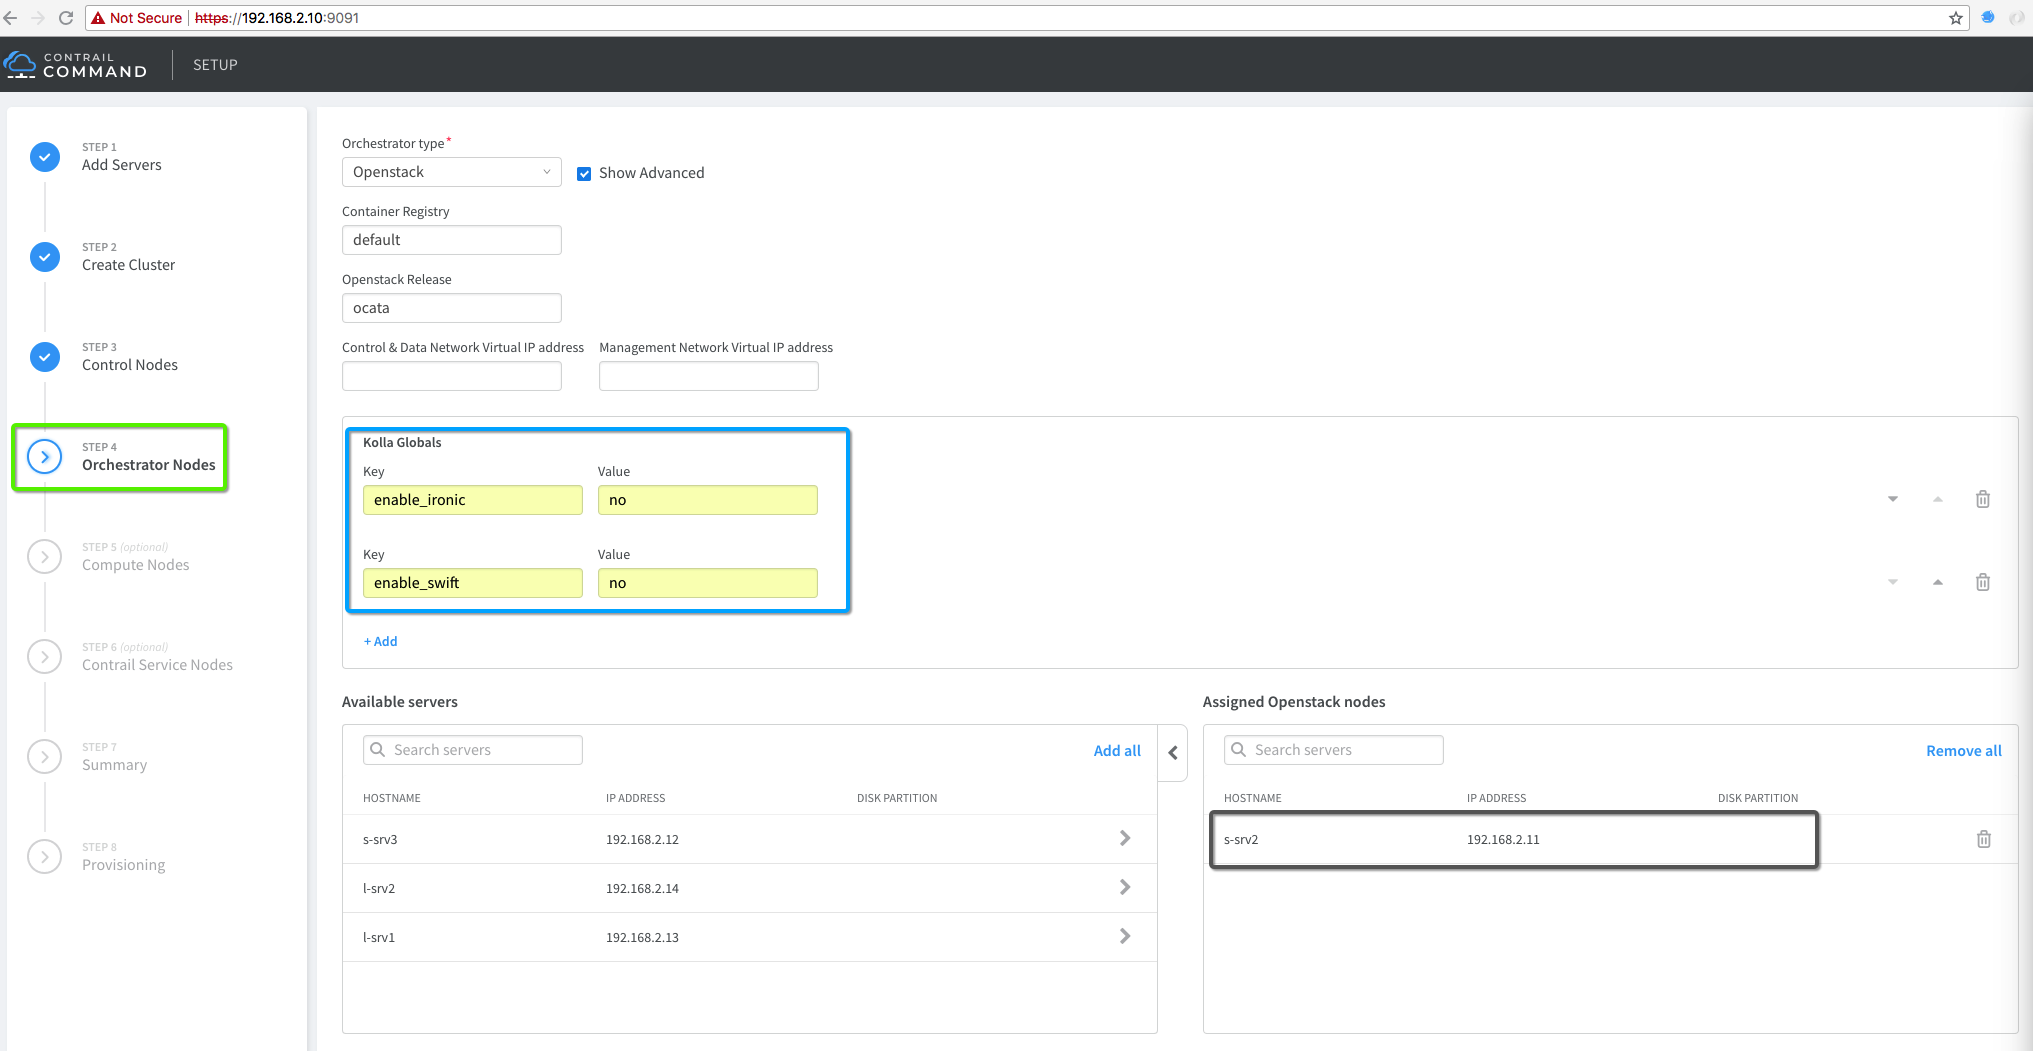
5. Add OpenStack Control Node (Orchestration)
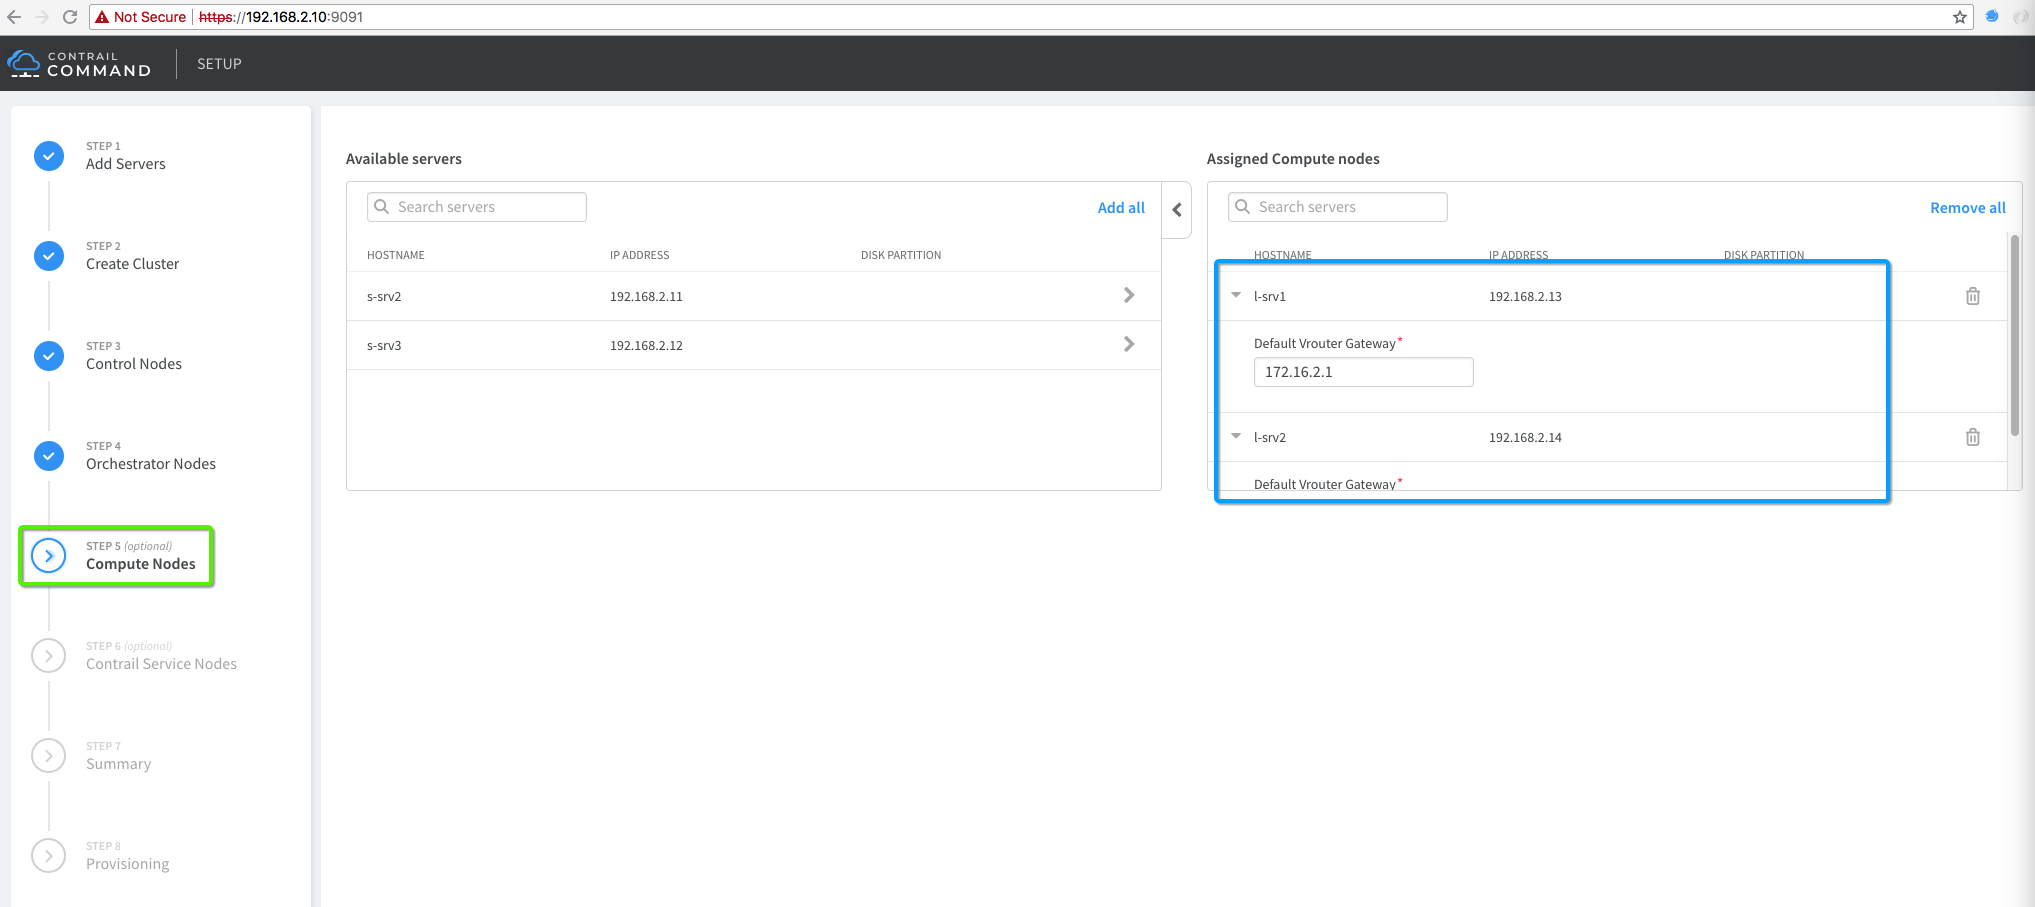
6. Add Compute Node
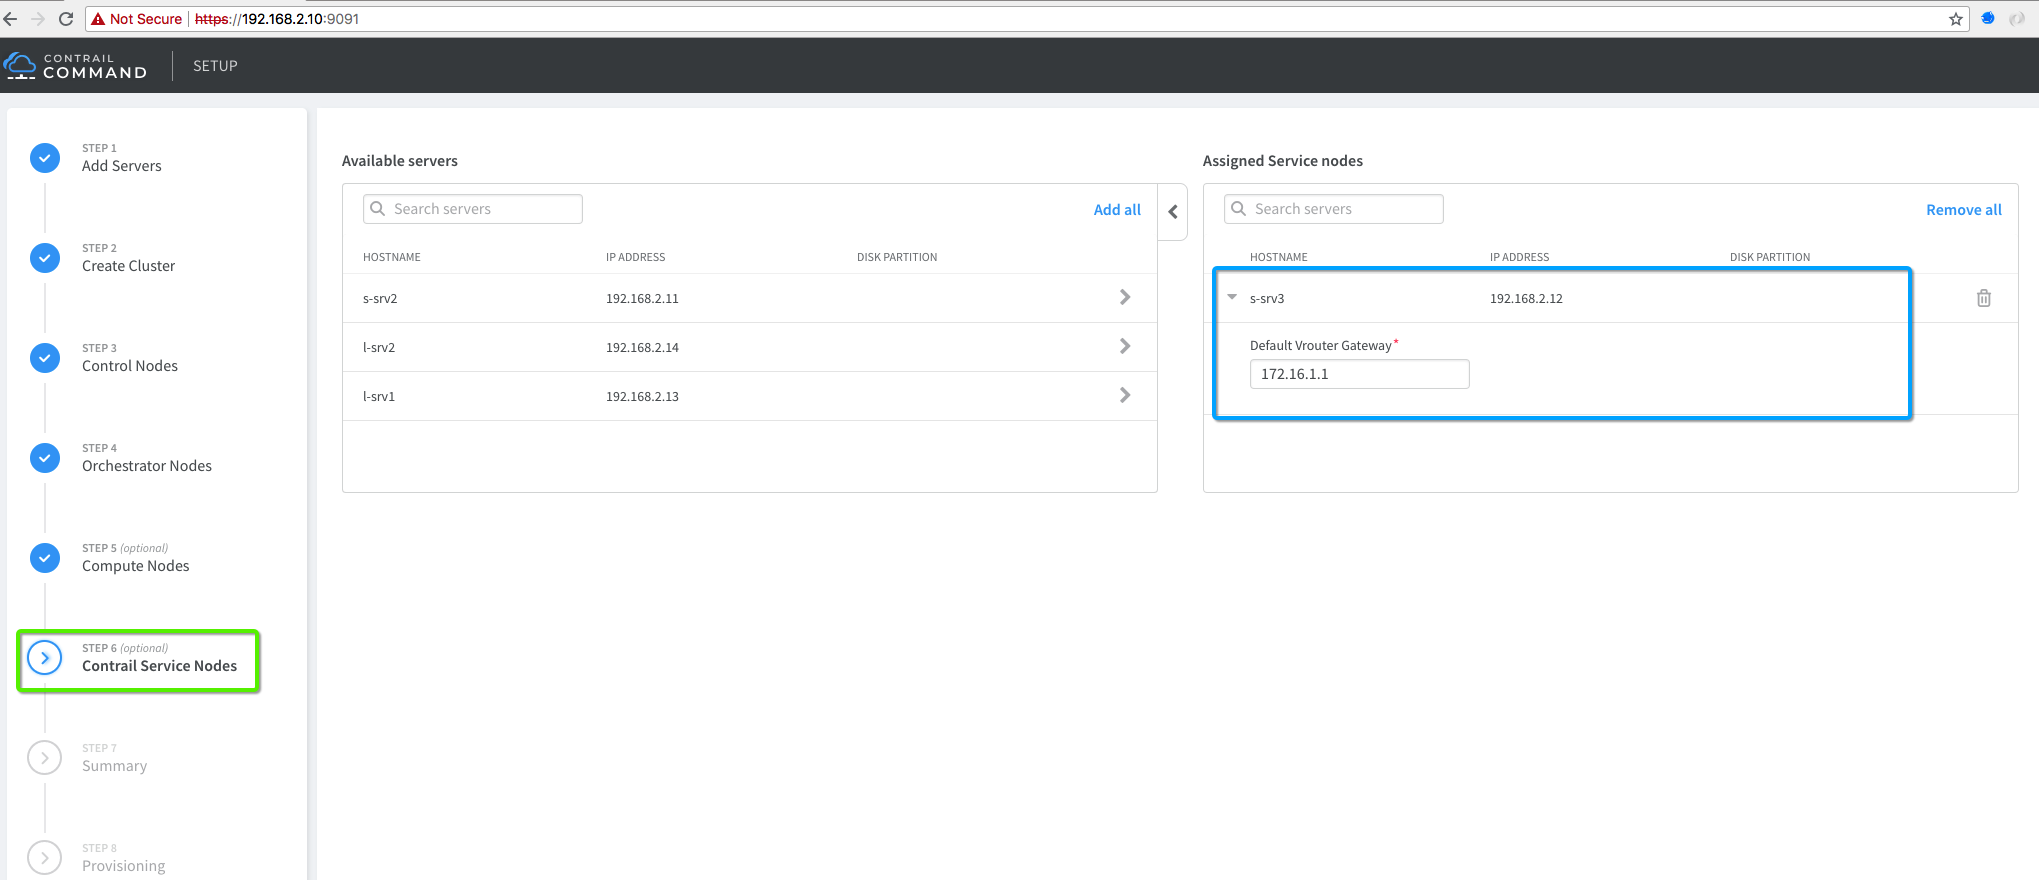
7. Add Contrail Service Node (Old TSN)
8. Cluster Summary
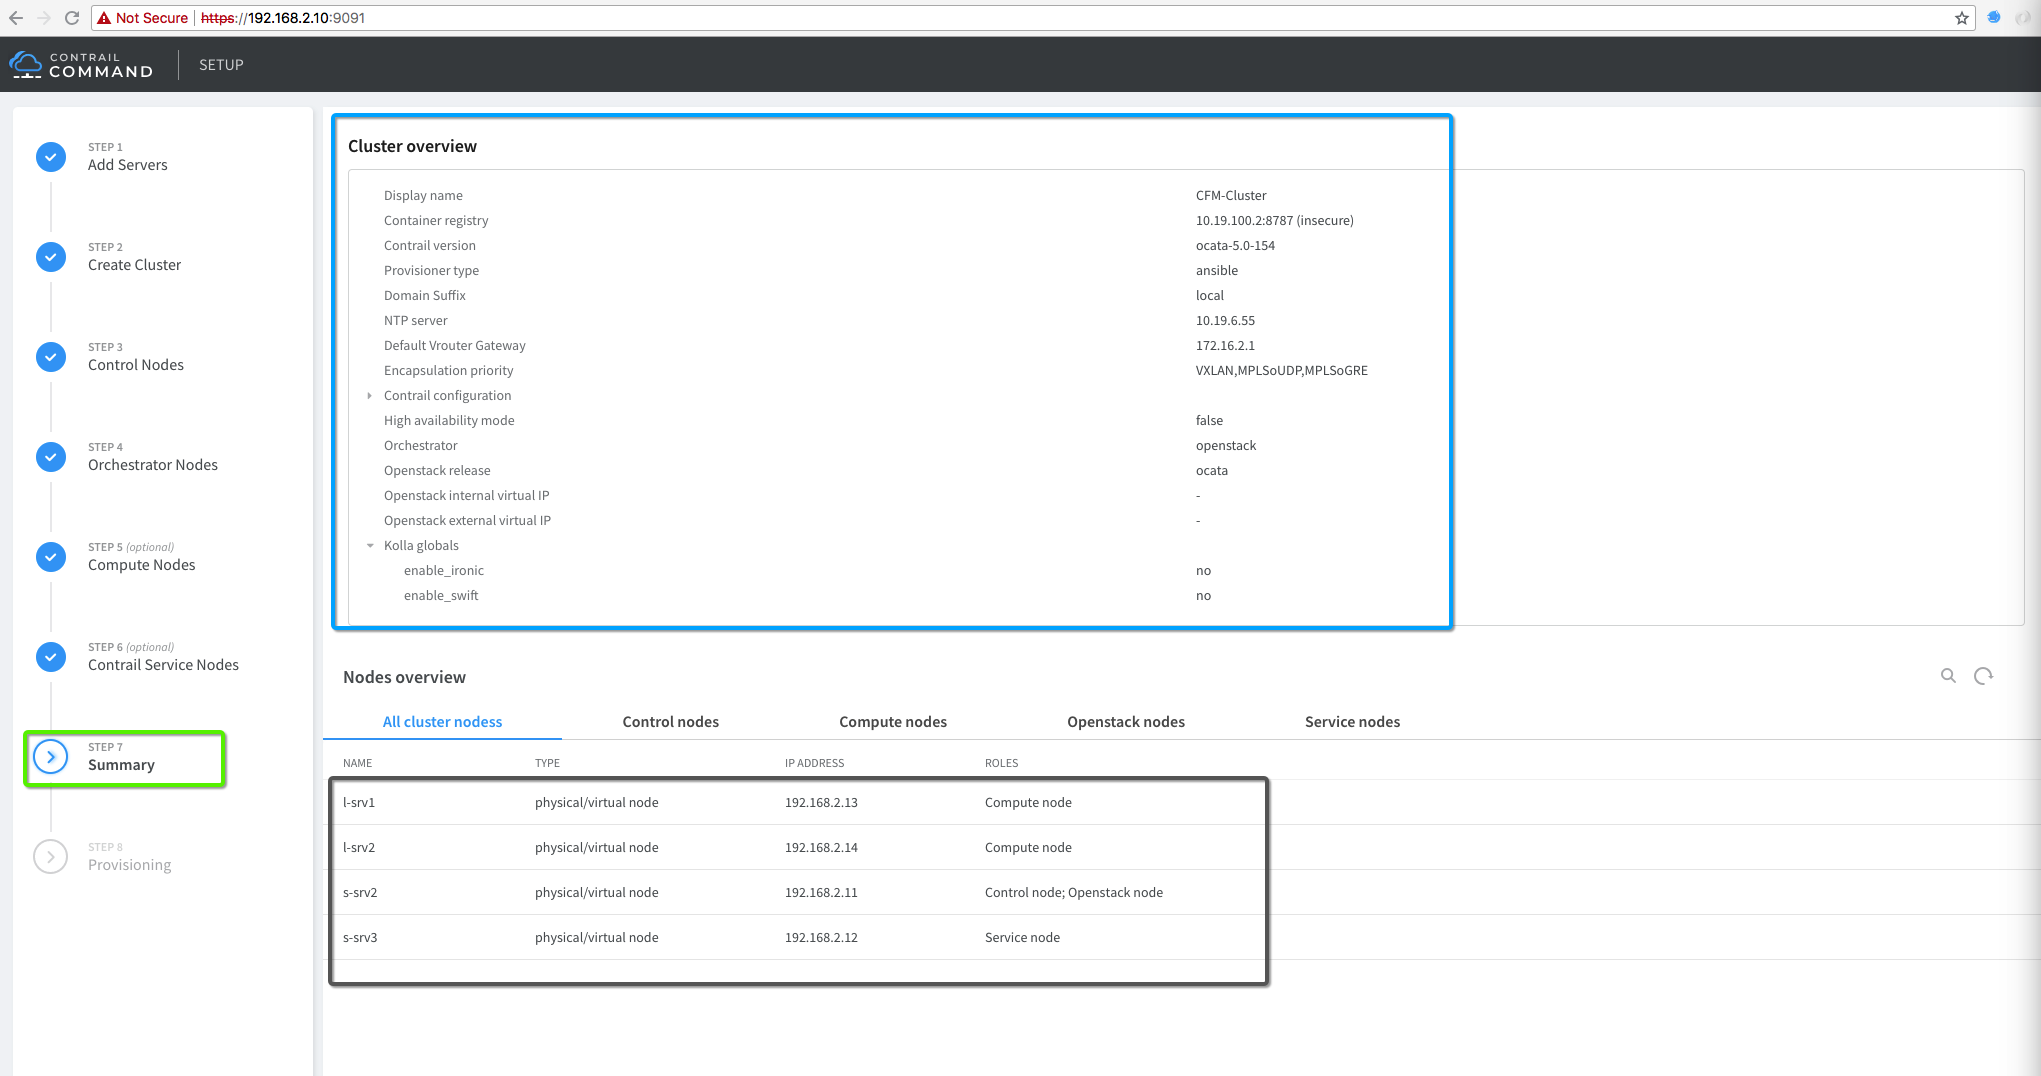
9. Cluster Summary
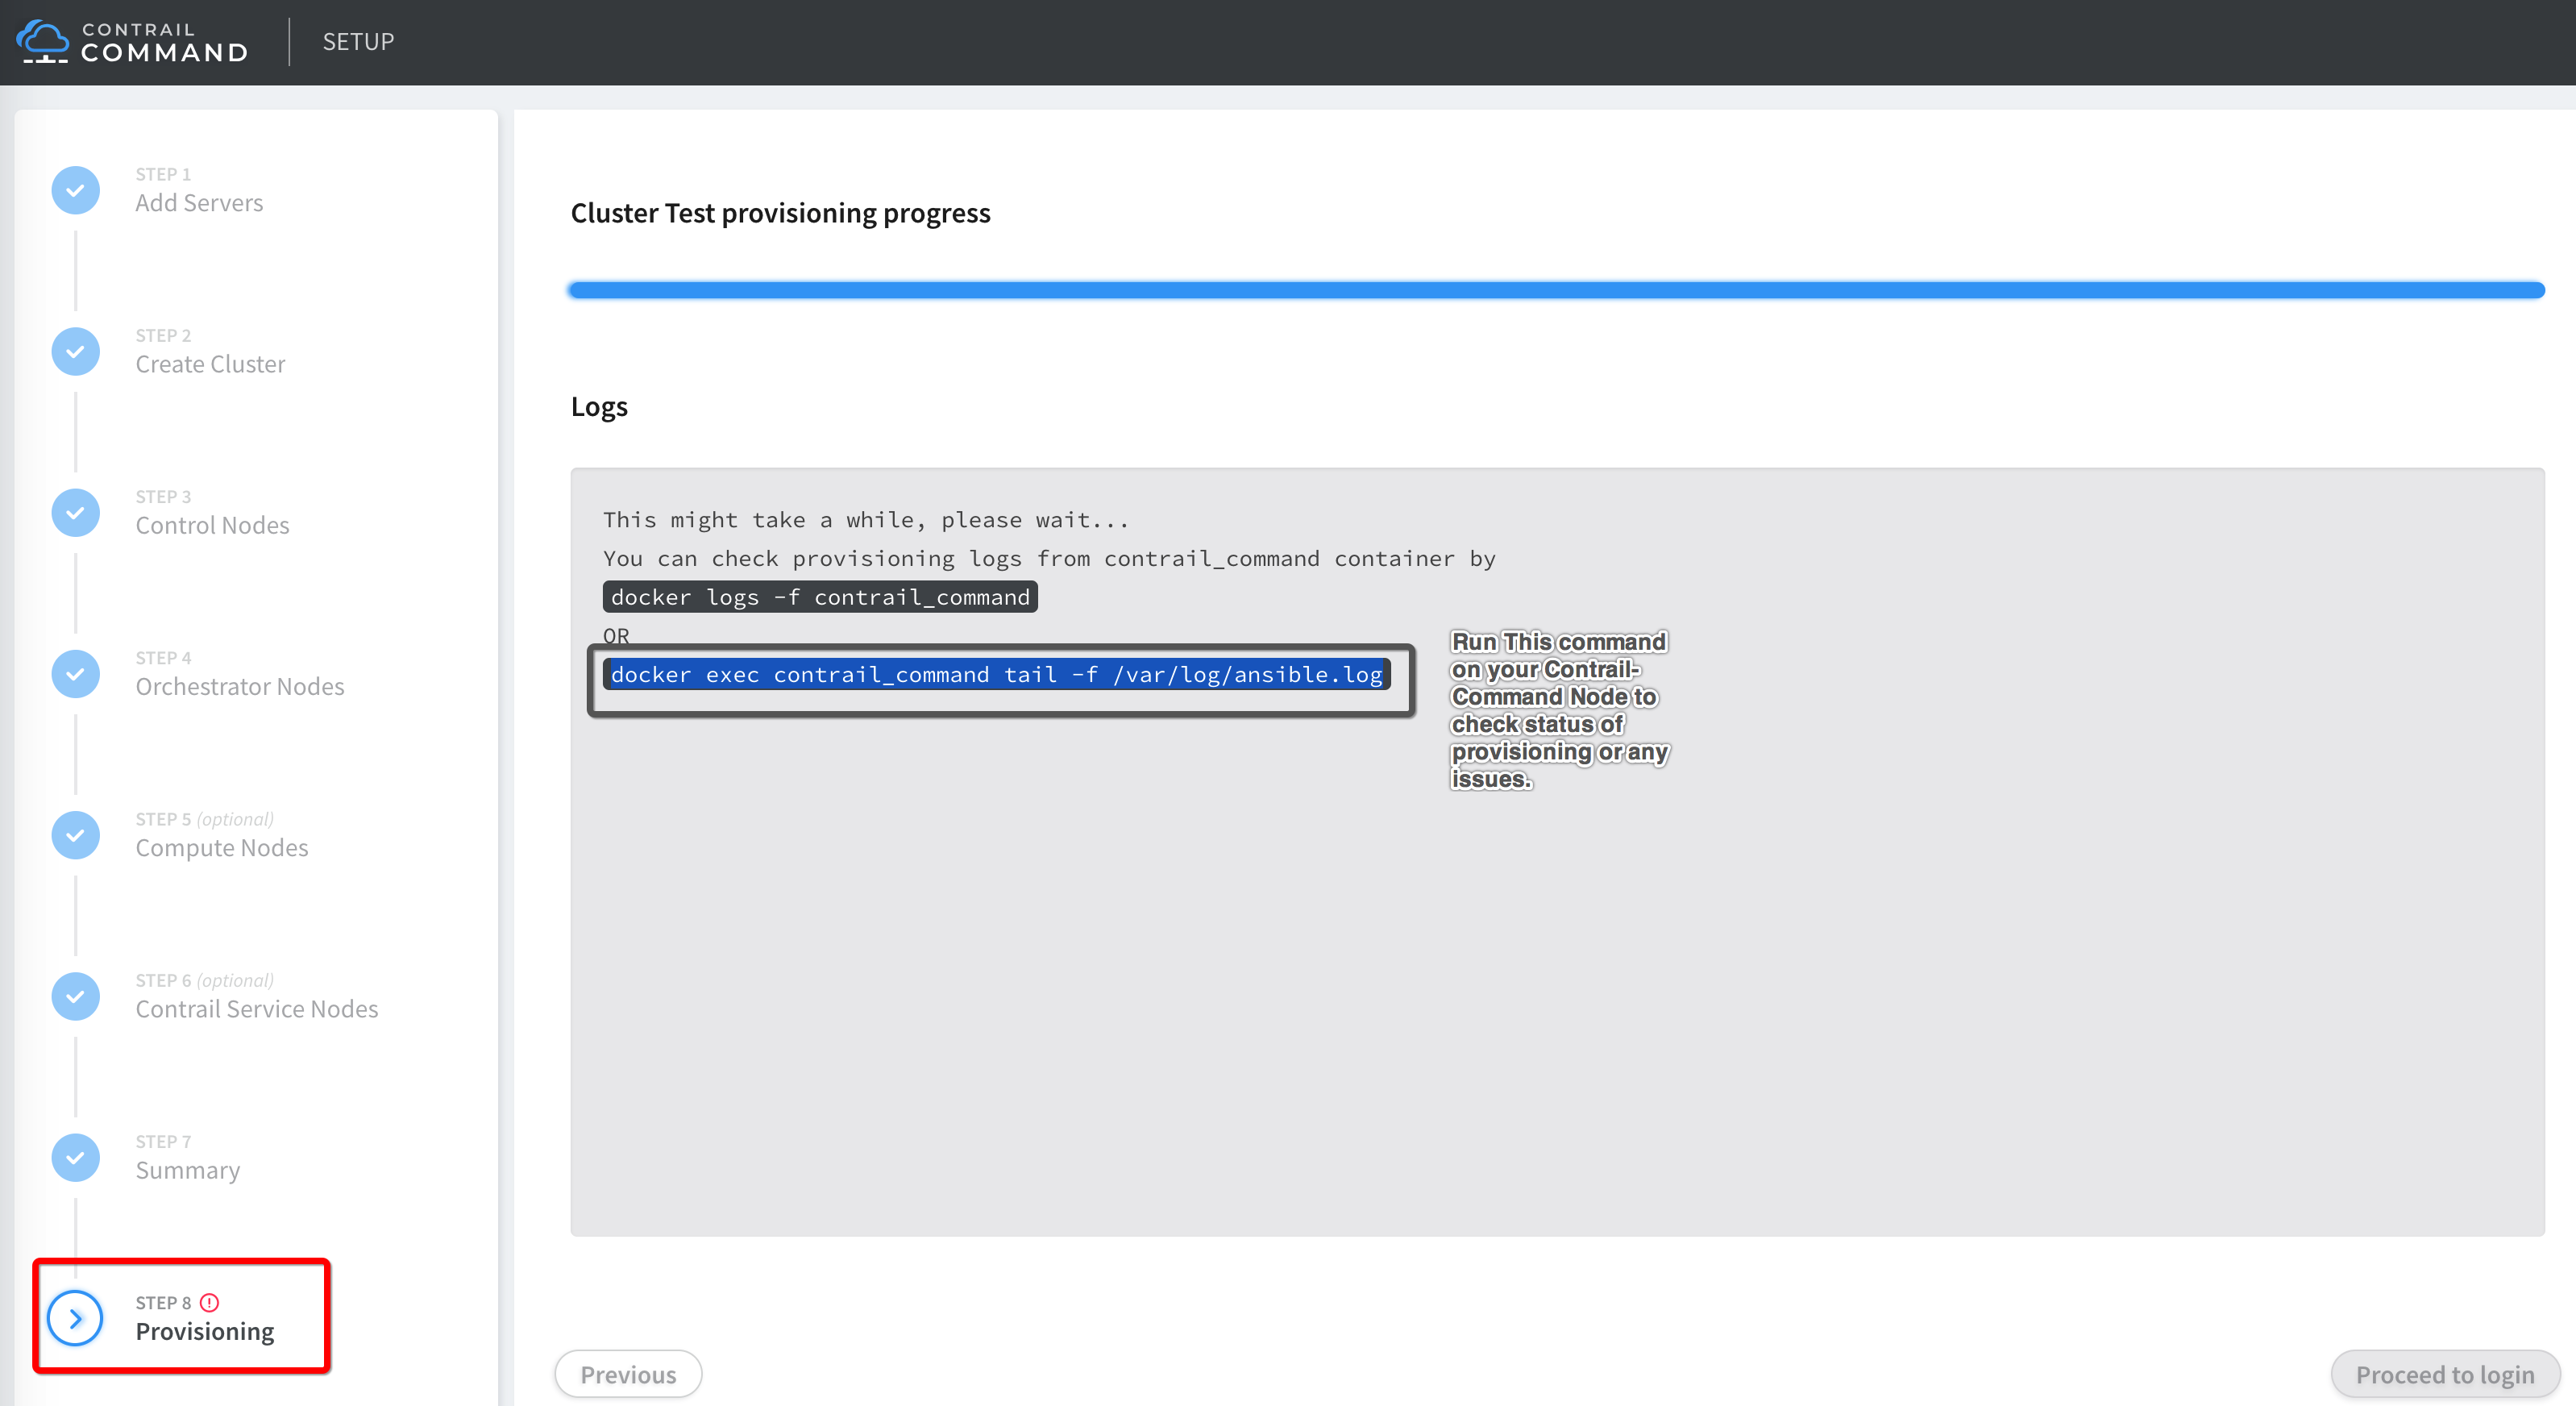
10. Check instances.yml
Contrail Command GUI creates instances.yml file used for clsuter provisioning at following location “/var/tmp/contrail_cluster/Cluster-UUID/”. Please check and review.
# Login to Contrail Command Container
docker exec -it contrail_command bash

# Autogenerated "instances.yml" file
cat /var/tmp/contrail_cluster/a3d545fa-3fe9-4f5f-b35c-a605cb30c408/instances.yml
global_configuration:
  CONTAINER_REGISTRY: 10.19.100.2:8787
  REGISTRY_PRIVATE_INSECURE: True
provider_config:
  bms:
    ssh_user: root
    ssh_pwd: c0ntrail123
    ntpserver: 10.19.6.55
    domainsuffix: local
instances:
  s-srv2:
    ip: 192.168.2.11
    provider: bms
    roles:
      config:
      config_database:
      control:
      webui:
      analytics:
      analytics_database:
      openstack_control:
      openstack_network:
      openstack_storage:
      openstack_monitoring:
  l-srv1:
    ip: 192.168.2.13
    provider: bms
    roles:
      vrouter:
        VROUTER_GATEWAY: 172.16.2.1
      openstack_compute:
  l-srv2:
    ip: 192.168.2.14
    provider: bms
    roles:
      vrouter:
        VROUTER_GATEWAY: 172.16.2.1
      openstack_compute:
  s-srv3:
    ip: 192.168.2.12
    provider: bms
    roles:
      vrouter:
        TSN_EVPN_MODE: true
        VROUTER_GATEWAY: 172.16.1.1
contrail_configuration:
  CONTRAIL_VERSION: ocata-5.0-154
  CLOUD_ORCHESTRATOR: openstack
  RABBITMQ_NODE_PORT: 5673
  VROUTER_GATEWAY: 172.16.2.1
  ENCAP_PRIORITY: VXLAN,MPLSoUDP,MPLSoGRE
  AUTH_MODE: keystone
  KEYSTONE_AUTH_HOST: 192.168.2.11
  KEYSTONE_AUTH_URL_VERSION: /v3
  CONTROLLER_NODES: 192.168.2.11
  CONTROL_NODES: 172.16.1.102
  TSN_NODES: 172.16.1.103
kolla_config:
  kolla_globals:
    openstack_release: ocata
    enable_haproxy: no
    enable_ironic: no
    enable_swift: no
  kolla_passwords:
    keystone_admin_password: contrail123
11. Compute Node QEMU (hypervisor/emulator) change if your Host does not support KVM HW virtualization (Nested mode)
Note: You usually need that for AWS setup which does not support HW virtualization. Your VM instance creation will fail and you have to make following changes in “nova-compute” before creating the workload.
vi /etc/kolla/nova-compute/nova.conf

# Add last two line under [libvirt] section
[libvirt]
connection_uri = qemu+tcp://192.168.2.12/system
virt_type=qemu
cpu_mode=none

# After making changes restart "nova_compute" conatiner on the compute
docker restart nova_compute
12. Install OpenStack Client and Images
After OpenStack and Contrail is installed, let’s install OpenStack Client on s-srv2, download cirros images, add images and create flavors.
Note: For lab workshop the script is already in “/home/vagrant” folder
wget https://raw.githubusercontent.com/qarham/cfm-vagrant/master/cfm-1x1-vqfx-7srv/scripts/install-os-clinet-images.sh
chmod +x install-os-clinet-images.sh

./install-os-clinet-images.sh
13. Basic Sanity Check (Not required for workshop)
To make sure Cluster provisioning is successful and no issue let’s create some work load using a simple basic sanity script “basic-sanity-test.sh”.
This script will perform following actions:
- install OpenStack client
- Download and Add cirros images
- Create VM flavors
- Create TWO VNs VN01: 10.1.1.0/24 & VN02: 20.1.1.0/24
- Instantiate two VMs in each VN (VN01 & VN02)
wget https://raw.githubusercontent.com/qarham/cfm-vagrant/master/cfm-1x1-vqfx-7srv/scripts/basic-sanity-test.sh

chmod +x basic-sanity-test.sh

./basic-sanity-test.sh
Other Tips
In case provisioning fail for OpenSTack/Contrail install and you would like to run ansible provisioning manually you can use following commands.
cd /usr/share/contrail/contrail-ansible-deployer

# For manual OpenStack Installation use following command
ansible-playbook -i inventory/ -e orchestrator=openstack -e config_file=/var/tmp/contrail_cluster/<Cluseter-UUID>/instances.yml playbooks/install_openstack.yml

# For manual Contrail Installation use following command
ansible-playbook -i inventory/ -e orchestrator=openstack -e config_file=/var/tmp/contrail_cluster/<Cluseter-UUID>/instances.yml playbooks/install_contrail.yml
To reset OpenStack Kola use following command:
Login to contrail_command container and follow the steps:
docker exec -it contrail_command bash
cd /usr/share/contrail/contrail-kolla-ansible
./tools/kolla-ansible -i ansible/inventory/my_inventory --configdir etc/kolla --passwords etc/kolla/passwords.yml destroy --yes-i-really-really-mean-it
Contrail Command Provisioning video recorded session (Click the icon)
![]()
References
- https://github.com/Juniper/contrail-ansible-deployer/wiki
- https://github.com/Juniper/contrail-command-deployer/wiki/Using-Ansible-to-launch-the-Contrail-Command-Containers